Want to brew great coffee at home but don't know where to start?
With so many methods-drip coffee, French press, pour-over, and espresso-it can feel overwhelming. But don't worry, brewing amazing coffee is easier than you think!
This guide will help you discover the best beginner-friendly coffee brewing methods, along with step-by-step instructions and tips for extracting the most flavor from your beans.
In this guide, you will learn:
- The best tools for home brewing - Why fresh beans, a good grinder, and a scale make all the difference.
- The top five brewing methods and when to use them:
- French Press - Produces a full-bodied and bold flavor, making it excellent for dark roasts.
- Chemex - Yields a clean and bright cup, ideal for lighter roasts.
- Hario V60 - Offers precise control over flavor, perfect for coffee enthusiasts seeking a tailored brewing experience.
- Moka Pot - Brews strong, espresso-like coffee, best for those who enjoy rich, dark flavors.
- AeroPress - Provides a smooth and versatile brew, great for on-the-go brewing due to its portability and quick process.
To give you a quick overview, here's how to pick the right brewing method for you:
| Brewing Method | Ease of Mastery | Flavor Profile | Brew Time | Best For |
| AeroPress | 5/5 | Smooth and versatile | 1-2 min | On-the-go brewing |
| French Press | 4/5 | Full-bodied and bold | 4-5 min | Dark roasts |
| Chemex | 3/5 | Clean and bright | 4 min | Lighter roasts |
| Moka Pot | 3/5 | Strong and espresso-like | 5 min | Rich, dark flavors |
| Hario V60 | 3/5 | Precise control over flavor | 2-3 min | Coffee enthusiasts |
Scroll down to discover how to brew coffee like a pro, avoid common mistakes, and elevate your daily cup.
Your perfect brew starts here!

Everything you need to start brewing coffee at home
There's a lot that can go wrong when brewing coffee at home, and the coffee that it produces can taste pretty bad because of it. Well, after reading this article, you'll have all the information to make amazing coffee from then on.
Down below, you'll find all the equipment that I believe can make a big difference between average coffee and great coffee.
I'll talk about coffee beans, coffee grinders, and so much more. Let's get into it!
"Jeffrey's suggestions are very practical and easy to follow. Before Jeffrey all I knew was instant coffee, now I started making my own coffee using a French press and hand grinder is on the way.
I always thought brewing coffee at home is a complex process, but Jeffrey made it really easy. Just follow Jeffrey's instructions and start making 'your own dream coffee.'"

Why a good quality coffee bean matters
Coffee beans are a big part of coffee. After all, making coffee is simply pouring water (either hot or cold) on top of ground coffee beans.
Coffee beans come in pre-ground and whole versions. When you want to produce the best coffee possible, you should use whole beans for home brewing. I'll talk about the best coffee grinders for these beans later.
Getting good-quality coffee beans is a must when you want to brew amazing coffee at home.
Now I know there are a lot of coffee beans on the market, so let me split them up into three types of coffee beans that you'll need to make great coffee at home:
- Light roasted coffee beans
- Medium roasted coffee beans
- Dark roasted coffee beans
These are the coffee beans that are most often used for the brewing of coffee around the world. They all have their distinct coffee flavor, and all of them are best used with a different coffee brewing technique.
- Light roasted coffee beans shine when using a pour over technique.
- You can use medium-roasted coffee beans for pour over coffee, but also for other brewing techniques.
- Dark roasted coffee beans are best used to make espresso and ristretto coffee.
By using the correct coffee beans for every coffee brewing technique, you're one step closer to producing great coffee at home.

Did you know that you can best store coffee in an airtight container? This way, the coffee beans keep all their delicious flavor. You can check out this article if you want to learn more about how long and how to store your coffee beans.
In this article, I'll talk about different coffee brewing techniques, and I'll also tell you which coffee bean I suggest using for each of them. This way, it'll be easier for you to make an informed decision on which coffee brewing technique you like the most.
How a good coffee grinder can make a big difference
Once you've chosen a good-quality coffee bean with a coffee roast that you like, it's time to grind the coffee beans.
The easiest way is to get the coffee ground when buying your coffee beans. For example, you can ask your local coffee roaster to grind the coffee beans depending on the brewing technique you want to use.
Just ask them to grind your coffee beans in a pour over grind when making coffee with the Chemex and Hario V60. These coffee techniques will sound weird if you don't know what they are.
That's why I've listed brewing techniques for both of them a bit further down the article.
There are two coffee grinders that are most commonly used:
- Manual burr coffee grinders
- Electric blade coffee grinders
These coffee grinders are both great to use. Each has its unique set of skills that might be of interest to you.
I have both a manual burr coffee grinder and an electric blade coffee grinder at home and have been using them since I've begun brewing coffee at home.
There's a big difference between these coffee grinders, and that is the speed and quality of the coffee grind:
- A manual burr coffee grinder produces the best and evenly ground coffee, but it can take pretty long to grind your coffee beans.
- The blade coffee grinder is super fast but produces a very uneven coffee grind, and because of this, your coffee can taste over and under-extracted.
The great part about both coffee grinders is that they aren't that pricey, and it is definitely worth getting either of them to produce the best coffee.
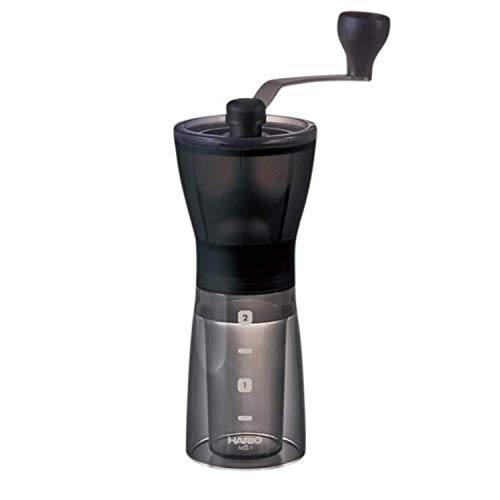
If you're interested in buying a manual burr grinder, I suggest checking out this Hario coffee grinder. I've been using this coffee grinder for a long time, and it has kept up really well. You can also check it out below:
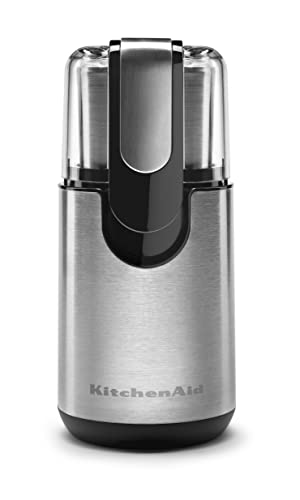
If you don't feel like hand grinding your coffee beans every day, I suggest using a blade coffee grinder. If you're interested in buying one, you can check out this coffee grinder, or have a look down below:
Both of these coffee grinders will get the job done, and you're one step closer to producing the best coffee that you've had in a long time.
Why I recommend using a scale when brewing coffee
The next important thing to brewing coffee at home is using a scale to check the amount of water and ground coffee you're using. The best coffee is produced when using certain coffee to water ratios, and each coffee brewing technique uses a different ratio.
It's essential that you use these ratios for the brewing of your coffee. For example, when using too much water, you're under-extracting your coffee.
And when you're not using the correct amount of coffee beans, you might not get the flavor that you'd otherwise get.
There's a ton of scales that you can use for the brewing of coffee. If you're feeling fancy and you're still looking for a great coffee scale, I recommend checking out this coffee scale, or have a look below:

This coffee scale has an internal timer that you'll most definitely need for the brewing of coffee, so it's a two-in-one product, if you will.
If you don't have a scale yet and want a casual scale that works amazing and is not so expensive, you can check out this scale, you can also click on the image below:

This coffee scale is relatively cheap compared to the other kind and will be much more accessible to most people.
Extra accessories that I suggest using
There are a few accessories that you most definitely need to make coffee at home, and it's as follows:
- Coffee filters for brewing pour over coffee
- Kettle to boil water
- Cooking timer
Let me start by explaining why coffee filters are a must when you're starting out brewing coffee at home. After that, I'll go over the kettle and cooking timer.
Coffee filters
Coffee filters ensure that you get the best extraction of pour over coffee, but you'll have a ton of options when it comes to them.
There are paper filters and metal filters. I suggest starting with paper filters when you're just starting out. They're a lot cheaper and are super easy to use.
When it comes to Chemex paper coffee filters, I recommend sticking with the official filter. This ensures the proper fit for your coffee brewer, and I have noticed that they are pretty cheap. You can check them out here or by clicking below:

You'll also see this coffee filter in the brewing guide a bit further down. I've been using these coffee filters since the first coffee brewing session a few years ago.
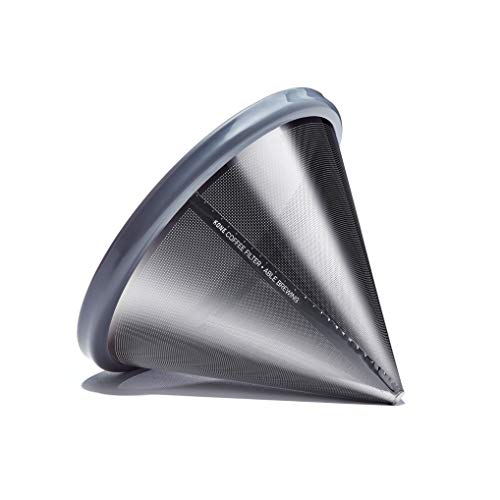
If you want, you can also buy a metal filter to brew your Chemex coffee with. You won't have to use paper filters, and the metal filter is very easy to clean. You'll only need to rinse it off after each brewing session.
If this is something you're interested in, you can check out the following metal Chemex filter. It has the best fit and feel possible and is not that expensive, considering that you can use it indefinitely:
The Hario V60 also uses this same pour over technique, and it also requires a coffee filter to produce coffee.
These coffee filters are a lot thinner than the Chemex kind, which is what makes these coffee brewers so different.
I also like to use paper filters for this coffee brewer. I've been using the branded Hario coffee filters from the start as well. If you don't have them yet, you can check them out below:

There are 100 filters in the packaging, and considering the price for the number of filters, it's really cheap to produce coffee at home.
You can also get a metal filter for the brewing of your Hario V60 coffee. This will also save money in the long run when you plan on brewing coffee with this coffee brewing for the time to come.
If you're interested in buying a metal coffee filter for the Hario V60, you can check out the following filter; you can click down below:

Pour over kettle
When you're producing pour over coffee at home, it will be best to use a dedicated pour over kettle to boil your water with.
The pour over kettle has a small water stream that allows the water to pour out at just the right speed and amount needed.
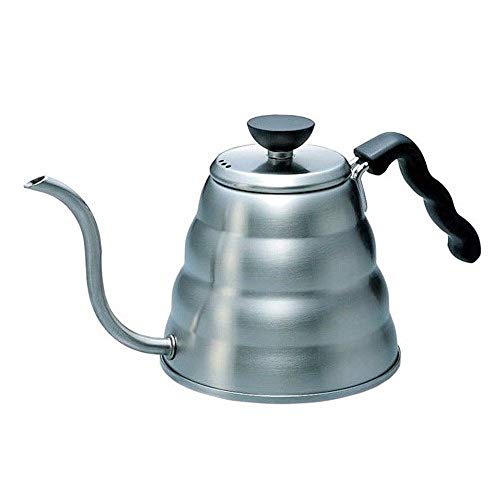
If you're interested in a pour over kettle for home, you can check out this Hario pour over kettle, which is just a perfect kind to start with. Optionally, you can click down below to check it out:
However, you'll be just fine when using the regular kettle that you use daily. The water will run out differently than what is best, but you'll still be able to make great coffee regardless.
The small water stream will simply ensure that the water will not touch the ground coffee too hard when pouring. When this happens, the coffee will be disturbed, but if you take it slowly, you'll be just fine.
When reading along, you'll find the brewing guides to pour over coffee, where I'll further explain the correct use of water.
Using a kitchen timer
A timer to know how long you've been brewing coffee is essential to check if you're on the right track.
If you don't have the amazing Hario scale with an integrated timer, you can also use a simple kitchen timer or the timer on your phone.
Either of these options will suffice, but don't forget to set that timer when you start brewing coffee using either of the brewing techniques I've listed below.
I've listed the brewing guides below, and I'll always tell you how long the water should run through or how long you should steep the coffee for, so keep that timer near you.
Beginner's guide to brewing coffee
It's now time to show you five different coffee brewing techniques: the French press, Chemex, Hario V60, Moka pot, and AeroPress.
All of these coffee brewing guides will include a step-by-step guide to brewing the coffee, and I've also listed the coffee beans to use and the water to coffee ratio for each.
Brewing guide French press
It's time to start showing you how to brew amazing coffee at home. For the first brewing technique, I will show you how to brew coffee with a French press.
What is a French press?
A French press is a coffee pot that is used to steep coffee in. It consists of multiple elements, including an outside shell, a beaker, and a plunger with a filter attached.
These elements make sure that you can brew amazing coffee. French press coffee is made by steeping ground coffee with water for about 4-5 minutes or even more in some cases.
It's the easiest way to brew coffee and has an amazing full-bodied coffee taste to it.
How to brew coffee with the French press?
I recommend brewing French press coffee with either medium or dark roasted coffee beans. These coffee beans pack the most amount of flavor and will work great for this steeping technique.
Medium roasted have a well-balanced coffee flavor with both a good amount of punch from the coffee roast and subtle flavors left.
Dark roasted coffee beans do also shine here. The coffee beans will have a stronger flavor than medium roasted coffee beans because of the darker roast, resulting in a fantastic cup of coffee.
I highly recommend using a medium coffee roast when starting out with French press coffee and leave the dark roast for a later date.
French press coffee is already a lot strong than pour over coffee, so you don't want to go overboard. Try a medium roast first before moving on to the strongest coffee beans.
To brew French press coffee, you're going to need quite a bit of ground coffee. I've listed the ratio of water to coffee down below, so you can easily check if you're using enough ground coffee:
| Amount of coffee made: | Amount of coffee needed: | Amount of water needed: |
| 1 cup (0.24 l) | 20 grams | 1 cup (0.24 l) |
| 2 cups (0.47 l) | 40 grams | 2 cups (0.47 l) |
| 3 cups (0.71 l) | 60 grams | 3 cups (0.71 l) |
| 4 cups (0.95 l) | 80 grams | 4 cups (0.95 l) |
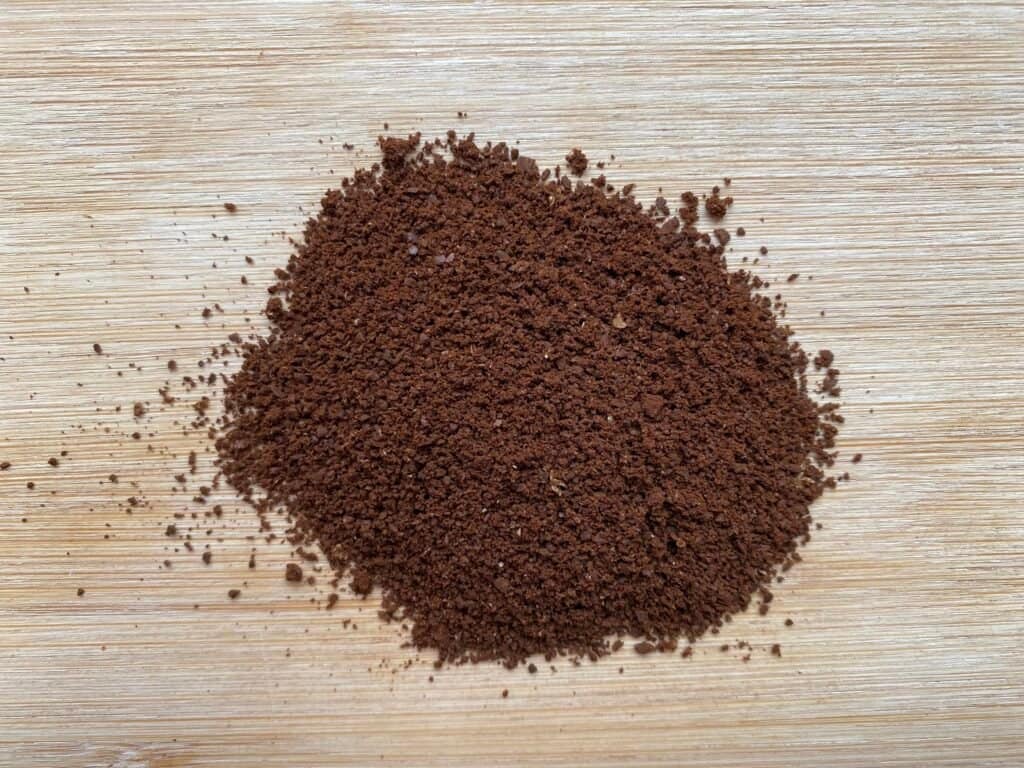
French press coffee is made by using a coarse grind size. The coffee grind size used will help ensure you extract all the flavor from your amazing coffee beans.
Because you're adding water and coffee into one container and then filtering it, you're creating a pot of coffee, where the water can slowly extract all the coffee flavors.
You don't want to use a fine grind size to make French press coffee because you'll over-extract your coffee, and it'll leave you with a super bitter coffee that is certainly not pleasant.
The coffee grind size that I like to use when brewing French press coffee looks like this:

As you can see from the photo above, the coffee has a ton of structure, which is a good sign. You don't want to go even coarser with the grind size, as this will leave you with an under-extracted sour coffee.
So you'll have to find a way between over- and under-extracting the coffee. I've found that the grind size I've listed works perfectly for this. Now it's time to show you how to brew Your Dream Coffee at home:
- Collect your ground coffee and the French press.
- Boil the amount of water for your batch of coffee. You can have a look at the coffee to water ratio for this.
- Add the ground coffee inside the beaker of the French press.
- Pour about 1/4th of the water on top of your ground coffee. The water will mix with the coffee ground and start the blooming process.
- Leave the coffee for 30 seconds so it can bloom.
- After that, pour on the remaining water.
- Place the plunger on top of the French press. Don't press down yet, but simply place it on top of the French press beaker, so it's closed off.
- Leave the coffee to steep for the next 4-5 minutes. I like to brew 4 minutes with a darker roasted coffee and 5 minutes with a medium roast.
- After the time has passed, press down the plunger. Go all the way down until you've pushed all the coffee ground to the bottom of the beaker.
- Now, pour out your delicious coffee and enjoy.


Because water and coffee are steeped together, there's a chance that smaller coffee particles will be left in your coffee while drinking. These coffee particles will sink to the bottom of your coffee, leaving a sludge.
You want to leave this sludge and throw it out, as it really isn't enjoyable and too strong to drink.
After you've enjoyed your coffee, you want to clean your French press the right way. I've made a cool list of 4 ways to clean your French press in 60 seconds or less; make sure to check it out, as it's really nice.
If you want to learn more about the details of brewing French press coffee, you can check out my beginner's brewing guide to brewing French press coffee. I'll talk more in-depth about the brewing process. If you're interested, make sure to check it out.
Brewing guide Chemex
It's now time to go over the first of two pour over style coffee techniques. The Chemex is the most widely known pour over method and can be found in most, if not all, coffee bars around the world.
What is a Chemex?
Before getting started on the Chemex brewing guide, it's time to give a brief introduction.
The Chemex is a pour over coffee brewer with the shape of an hourglass. The design of the coffee brewer ensures that a proper extraction is possible.
Coffee is brewed with the Chemex by pouring water on the brewer's top part, where a coffee-filled filter is located. Hot water is then poured on top in a circular motion to start the brewing.
It uses a thick coffee filter to brew the coffee. As I've discussed above, you can also use a metal coffee filter that you can reuse. However, most of the time, a paper filter is used, and for the sake of this article, I'll explain it with a coffee filter.
How to brew coffee with a Chemex?
Brewing coffee with a Chemex is super fun and exciting. It's one of my favorite coffee techniques. The first step to brewing amazing coffee with the Chemex is grinding the coffee beans to the right consistency.
I suggest using a light or medium roasted coffee bean for Chemex coffee. You can extract all flavors because of the use of a filter. So even the lighter roasted coffee beans have a real chance to shine.
Moreover, I highly recommend starting with a medium roasted coffee bean for this technique. The coffee flavor will be just right. Lighter roasted coffee beans can have a unique taste that some will dislike.
Sticking with a medium roast will ensure that you actually like the coffee you're making. I think that after brewing coffee for a while, you'll be used to the homemade coffee flavor and can start using a lighter roast.
Grinding the coffee beans is the next step. You want to aim for a medium-fine coffee grind size for pour over coffee. The grind size will still have a bit of structure in it but will be fine enough that the water can fully extract all the coffee flavor.
I can describe the coffee grind size like a raw sugar kind of texture, with a few finer pieces in there. It looks like this:

As you can see from the photo above, it has just a bit of texture in it but is mostly made up of the finer coffee pieces.
Chemex coffee uses a different amount of coffee to water ratio than the French press. I've listed a coffee to water ratio table down below, so you can check out the amount of coffee you'd like to make and how much coffee you'll need:
| Amount of coffee made: | Amount of coffee needed: | Amount of water needed: |
| 1 cup (0.24 l) | 21 grams | 1 cup (0.24 l) |
| 2 cups (0.47 l) | 42 grams | 2 cups (0.47 l) |
| 3 cups (0.71 l) | 63 grams | 3 cups (0.71 l) |
| 4 cups (0.95 l) | 84 grams | 4 cups (0.95 l) |
Now that you know what the best coffee beans are for Chemex coffee, how to grind the coffee beans, and how much ground coffee to use, it's time to brew some Chemex coffee.
To make Chemex coffee, you can follow the next steps. I'll explain everything step-by-step so you can easily follow along. I've also attached a few photos of the most important parts of brewing coffee with the Chemex:
- Collect your ground coffee, a Chemex coffee filter, and of course, the Chemex itself.
- Start by boiling enough water to brew the coffee you want to make, and add a bit more. You will use the extra water to rinse the coffee filter.
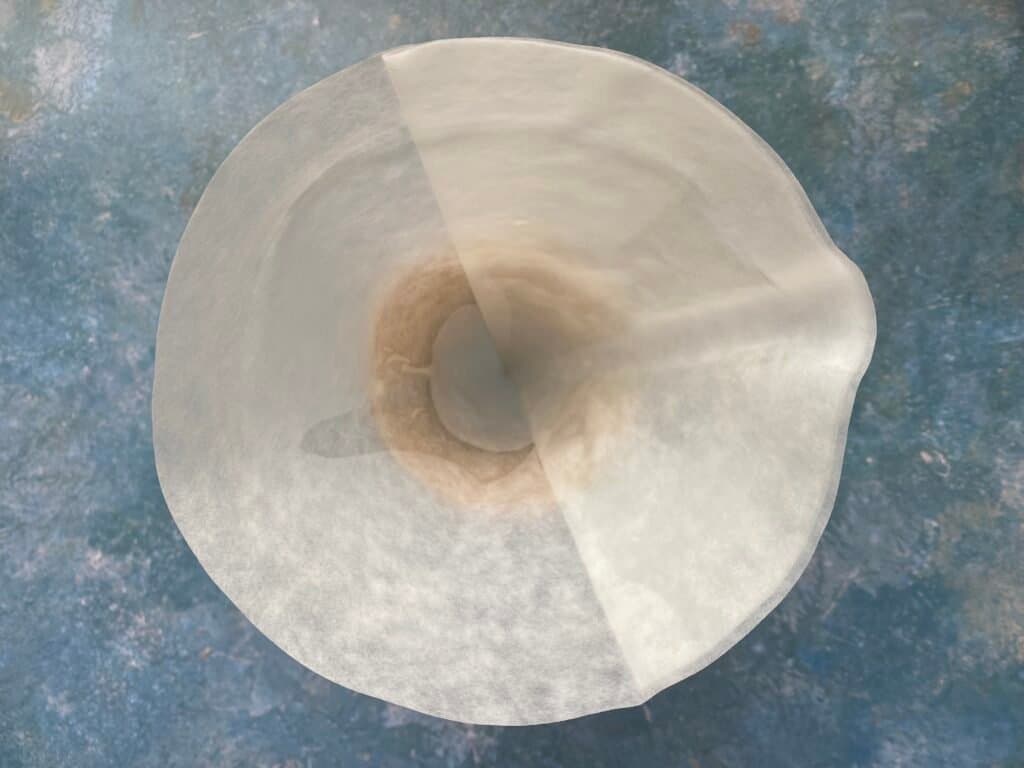
- Add the coffee filter to the top part of your Chemex. It has been folded and has four sides to it. Place the thicker, three-fold part on the pouring spout side.
- Rinse the coffee filter by pouring enough hot water through the filter to wet the whole filter. The water will slowly run through the Chemex. Throw out the filtered water. It's best to remove the Chemex filter, throwing the water out, and placing the filter back.
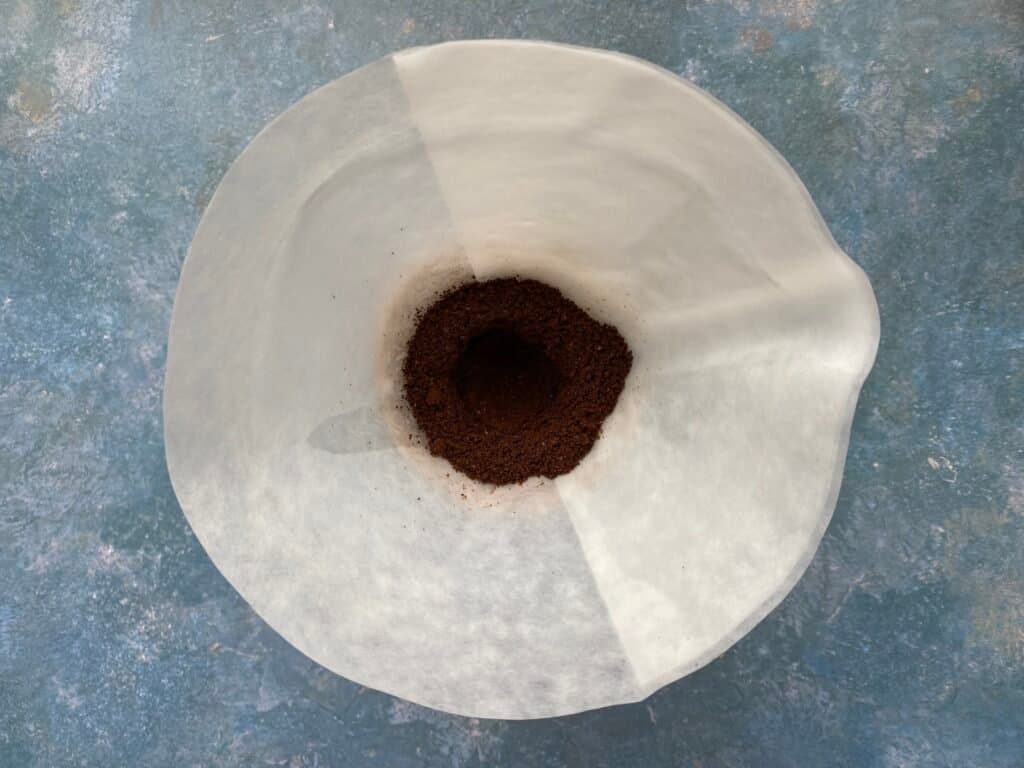
- Now, add the ground coffee into the coffee filter and make a small hole in the middle of the ground coffee. The hole will help wet all the ground coffee beans equally.
- It's now time to pour on 1/4th of the total water you're going to use. For example, I'm using 500 ml of water, so I'll be adding 125 ml of water right now.
- Slowly pour the water on top of the ground coffee, making sure to wet all the coffee grounds.
- Leave this mixture to brew for the next 30 seconds. This is called the "blooming" stage.
- After blooming the coffee, slowly pour in the remaining water. Do so by pouring in circular motions so that every coffee particle will be wetted.
- If you're making more than 500 ml of coffee, you can't pour in all the water at once as the coffee brewer will overflow. You can do this in three steps then. Leave the coffee to run through a bit, then add the next amount of water.
- After you've added all the water needed, grab a small spoon. Swirl through the coffee mixture. The ground coffee likes to stick to the sides of the filter and cannot be extracted from its coffee flavor this way. The swirling will help the coffee particles sink to the Chemex's bottom, where all the flavors can be extracted.
- Leave the water to run through the coffee filter for the next few minutes. The amount of time this takes varies depending on the amount of coffee made. For a 500 ml pot of coffee, it will take you roughly 4 minutes for the coffee to finish brewing.
- After all the water has run through the coffee filter, you can remove the filter from the Chemex.
- You've just made a nice batch of Chemex coffee. And it's now time to enjoy it!


The next most important part of enjoying your coffee to the fullest is using a clean coffee brewer every time. I've written an article where I show you 5 ways to clean a Chemex.
I've just gone over everything you need to brew amazing coffee at home. If you're interested in going even more in-depth to brewing Chemex coffee at home, I suggest checking out my beginner's guide to making Chemex coffee.
Brewing guide Hario V60
The Hario V60 uses the same technique as the Chemex. It's also pour over technique but has subtle differences that can make a real difference in taste.
What is a Hario V60?
The Hario V60 is a pour over technique that follows the same steps as the Chemex, but there's definitely a difference in taste.
This coffee brewer uses a thinner coffee filter and has small grooves in the coffee brewer that guide the water to the middle of the coffee brewer at all times. This results in amazing coffee extraction.
Most of the time, the Hario V60 is used to brew a smaller batch of coffee. You can use it to brew only one cup of coffee at a time, whereas the Chemex is a lot bigger and is best used to brew coffee for two cups or more.
I like to use my Hario V60 when brewing a cup of coffee for myself, but when I've got people coming over, I'll switch to the Chemex.
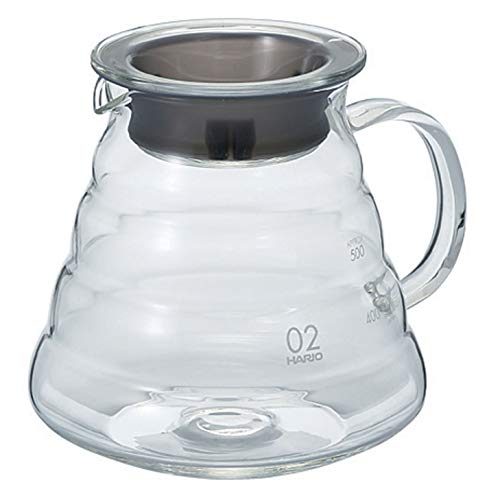
You can also buy a Hario V60 coffee server; this will work great when you want to brew more than just one cup of coffee and transform it into a Chemex of sorts this way. It's really cool, and you can check it out here or by clicking below:
How to brew coffee with a Hario V60?
To brew amazing coffee with the Hario V60, you'll want to use either light or medium roasted coffee beans. These coffee beans will make an enjoyable full-flavored cup of coffee, just like the Chemex.
For this technique, a coffee filter is also necessary. I like to use paper filters to brew my coffee, but you can totally use a metal filter if you like to use it.
The coffee grind size is almost the same as the Chemex uses, but just a touch finer. Because of the Chemex coffee filter's thickness, it's best to use a slightly coarser coffee grind.
The water will have a longer travel time through the thicker Chemex filter and has more time to extract. However, the Hario V60 uses a thinner filter and has a much quicker extraction because of it.
This is why I like to use a fine/medium grind size when brewing coffee for the Hario V60. It will help the water extract all the fantastic flavors that coffee has to offer and leave you with the most amazing cup of coffee.
My favorite Hario V60 grind size looks like this:

As you can see, it isn't that different from the Chemex grind size. But when you start to feel it between your fingers, you'll notice the difference.
It almost feels like fine sea salt, but with a bunch of coarser coffee pieces in there. You don't want to use a too fine coffee grind size, as this will leave you with an over-extracted cup of coffee.
By going too fine, you'll give the water a chance to extract all the coffee flavors, even the flavors that make for a lesser pleasant cup of coffee, so it's all about finding that balance on your coffee grinder.
I turn the coffee grinder two turns to a finer setting for the Hario V60, starting from the Chemex coffee grind. But this can differ between coffee grinders, so play around with the coffee grind size.
I think that the grind size photo will help you find that amazing grind size in no time! I've listed the water to coffee ratio for the Hario V60 below:
| Amount of coffee made: | Amount of coffee needed: | Amount of water needed: |
| 1 cup (0.24 l) | 18 grams | 1 cup (0.24 l) |
| 2 cups (0.47 l) | 36 grams | 2 cups (0.47 l) |
| 3 cups (0.71 l) | 54 grams | 3 cups (0.71 l) |
| 4 cups (0.95 l) | 72 grams | 4 cups (0.95 l) |
I like to use a bit less coffee to brew Hario V60 coffee, compared to Chemex coffee. This is all because of the faster extraction time and the difference in the filter.
For me, this is the sweet spot for the amount of coffee used. I've been testing the amount of coffee used for a long time now, and the amounts of ground coffee I've mentioned in this article make for the best coffee, in my opinion.
It's time to start with the brewing guide for the Hario V60. I've listed a step-by-step guide down below, so you can easily follow along:
- Collect the Hario V60, the coffee filter, and your ground coffee beans to get started.
- Boil enough water for the amount of coffee you want to make and a bit more to rinse the coffee filter.
- Place the coffee filter in the coffee brewer and pour boiling water through the coffee filter. I like to hold the coffee brewer above my sink to discard the filtered water easily.
- Now, place the coffee brewer on top of your favorite mug. Or on top of the coffee server when using one.
- Place the ground coffee in the middle of the coffee filter and make a small hole in the middle.
- Pour 1/4th of the total water on top of the ground coffee and let this bloom for the next 30 seconds.
- After the blooming period, it's time to pour on the next batch of water.
- I like to use the next half of the total water left, slowly pour the water on top using circular motions.
- Let this run through a tiny bit, and then pour on the remaining water.
- Grab a small spoon and stir through the coffee. This will help get those tiny coffee particles into the bottom of the coffee brewer.
- The grooves of the Hario V60 will ensure that the water travels through the middle at all times, so you want to make sure that all coffee grounds are there to be extracted.
- Let the water run through the coffee. It usually takes me between 2 and 3 minutes before all the water has gone through the filter. This can change depending on the amount of coffee and water used.
- After the coffee has brewed, remove the Hario V60 from your mug or coffee server and enjoy your coffee!


The coffee filter can be thrown out when you're using a paper filter. When using a reusable metal coffee filter, clean it together with your coffee brewer.
I've made a cleaning guide where I show you 4 ways to clean your Hario V60 using different techniques. It's interesting, and you can get rid of those tough-to-clean stains that might stick on your coffee brewer after some time.
If you're interested in going more in-depth about brewing coffee with the Hario V60, I suggest reading through my beginner's brewing guide of the Hario V60. It's amazing if you want to learn even more about it.
Brewing guide Moka pot
A Moka pot is a very special coffee brewer that makes amazing stovetop coffee. It uses a technique that is not used in the other coffee brewers mentioned in this article.
It uses steam that builds up within the coffee brewer from the added water. The steam pushed the water through the coffee bed. This will leave you with such an amazing espresso coffee that will amaze you.
What is a Moka pot?
The Moka pot comes in various sizes and shapes and can be used on a stovetop, induction, and even on an open fire if you feel like it.
I use the induction Moka pot, as I use induction instead of gas at home. However, there isn't a difference in taste when brewing coffee with the Moka pot, using a stovetop, or induction.
It's really easy to brew coffee with it once you get a feeling for it. It uses more coffee than you'd typically use, and it might take you a bit to get the proper extraction. But not to worry, I've made a step-by-step guide to brewing coffee with it down below:
How to brew coffee with a Moka pot?
The best coffee beans to use when producing coffee with the Moka pot are dark roasted coffee beans. These coffee beans will make for a fantastic espresso coffee that the Moka pot is best at producing.
I've also tried brewing coffee with a medium roast, but the flavors from the coffee were not what I had expected and a bit underwhelming.
Lighter roasted coffee beans don't even come close to the flavor that darker roast can produce. Lighter roasts are best used to produce pour over coffee. With the use of those coffee filters, the unique coffee flavors can really shine.
I can't recommend anything lighter than a medium roast to brew coffee with a Moka pot. It's kind of a waste to make coffee using these coffee beans with a Moka pot.
The coffee grind size is an important factor in every coffee brewing technique. It has a real impact on the amount of flavor that your coffee will have.
When brewing coffee with a Moka pot, you want to use a fine grind size. The fine grind size makes for the best extraction, and this, combined with the dark roasted coffee beans, is an absolute threat.
The grind size I like to use when brewing coffee with a Moka pot looks like this:

As you can see from the above-listed photo, the coffee grind size is the finest of all the grind sizes I've mentioned in this article.
The fine grind size is there, so the pressured water has just a tiny bit of trouble to push through the coffee bed, making for such an amazing tasting coffee.
When using a coarser grind size, you'll under-extract the coffee as the water will push through the coffee bed too easily, leaving a ton of flavor behind.
This coffee grind size is pretty easy to get right, as it's such a fine grind size. However, make sure not to go too fine, as this will over-extract the coffee.
I believe that the correct grind size for Moka pot coffee feels like fine sand you'd find when you're on the beach. Or the finest sea salt you can find. But it shouldn't feel like a fine powder.
The amount of coffee that is best used to brew coffee with a Moka pot depends on how much you like to make. I've made a table to show you the amount I like to use:
| Amount of coffee made: | Amount of coffee needed: | Amount of water needed: |
| 2 oz (60 ml) | 20 grams | 4 oz (120 ml) |
| 4 oz (120 ml) | 40 grams | 6 oz (180 ml) |
| 6 oz (180 ml) | 60 grams | 8 oz (240 ml) |
| 8 oz (240 ml) | 80 grams | 10 oz (300 ml) |
It's kind of hard to name an exact number for the amount of water you need. Because quite a bit of water already evaporates in the Moka pot, you want to add a bit more water to it.
The produced coffee will not taste good when you're using the exact amount of water I've mentioned. It's actually better to add more water to the bottom compartment and remove the Moka pot from the heat a bit earlier.
Using this technique, you create the best-flavored coffee with enough power to push through the coffee bed.
To make produce coffee with a Moka pot, you can follow the next steps:
- Grab your Moka pot with all its attachments and your ground coffee.
- Add the ground coffee into the filter cap. Once all the coffee is in there, slightly compress it. This will help with the perfect extraction.
- Boil your water and pour this into the bottom compartment. Make sure to add a splash or two more into there.
- Place the coffee-filled filter cap on top of the bottom compartment.
- Twist the top on there, making sure to handle this with care as the sides of the Moka pot will be boiling.
- Place the Moka pot on medium heat.
- You can leave the lid of the Moka pot open so that you can check the progress of the coffee brewer.
- It will take about two minutes before any coffee comes out of the little spout. So don't worry if nothing happens for the first minute or so.
- Now, you'll start to see a little coffee coming out of the spout. You want to produce enough heat that the coffee can run through there smoothly but not use too much that it shoots out. You basically want a consistent stream of coffee coming out.
- Turn the heat up if the coffee comes out to bubble, and turn the heat to a lower setting if it comes out too quickly.
- Once you see golden syrupy-looking coffee coming out of the Moka pot, remove the coffee brewer from the heat. This is the cue that the best coffee has been extracted.
- You can now pour out your amazing espresso coffee.
- Let the coffee brewer cool down before taking it apart to prevent getting your fingers burned.


Once you've enjoyed your coffee, it's time to clean your Moka pot. Twist the cap from the bottom compartment and remove the coffee puck from the coffee brewer.
Now you're left with a bunch of compartments you can separately clean and dry. It's really simple, and you'll be done in less than 60 seconds.
You can use the espresso coffee for drinking as is, or you can use it as the basis for various coffee recipes that call for an espresso.
A few examples for coffee recipes with espresso as the basis are:
If you want to make an iced coffee with espresso coffee as the basis, you can check out the following coffee recipes:
There are so many ways to enjoy coffee from home, and the great part is that it doesn't have to cost a whole lot!
If you're interested in learning more about the Moka pot and specifically the beginner's guide to Moka pot coffee, you can check it out here.
Brewing guide AeroPress
The AeroPress is one of the more interesting ways to brew coffee at home and one of the fastest.
This coffee brewer is nothing like other coffee brewers I've talked about in this article. It has its own place in the coffee world because you can brew different coffees with it.
What is an AeroPress?
An AeroPress is a coffee brewer that uses pressure to produce quality espresso-like coffee. It uses two cylinders that press amazing coffee within 10-15 seconds of pouring water into the coffee brewer.
The coffee brewer is made to get a cylinder with a filter cap twisted on the bottom. In there, ground coffee and hot water is added. Once stirred, the second plunger is put on top and pressed down.
And you're left with an amazing espresso-like coffee that can be used in so many coffee recipes or can be diluted to create an Americano or Long black coffee. The options are endless.
How to brew coffee with an AeroPress?
The first part of brewing coffee with the AeroPress is understanding which coffee beans work best and the best grind size.
AeroPress coffee is best made by using dark roasted coffee beans. You can also use medium roasted coffee beans, but the coffee that comes out of the press might be a little underwhelming.
An AeroPress produces amazing espresso-like coffee. The small amount of coffee that comes out needs to have an amazing full-bodied flavor.
Most of the time, espressos are used as the basis for great coffee recipes. And when making a coffee recipe, you want a strong cup of coffee that can handle the rest of the ingredients, creating a well-balanced coffee drink.
Dark roasted coffee beans are the way to go if you ask me. You'll also be amazed by the full flavor profile these coffee beans have to offer.
The grind size that is best used when making coffee with the AeroPress is a fine/ medium grind size.
- When you grind the coffee beans too coarse, the water will run through the coffee filter before you have time to place the plunger on top.
- When you grind your coffee beans too fine, you'll have a tough time pressing down on the AeroPress and risk the coffee brewer shooting off your cup.
So it's all about finding that perfect coffee grind size that eliminates both risks. The grind size that I like to use looks like this:
As you can see from the photo above, the grind size is pretty fine. It's not as fine as the Moka pot grind size, though. You want to have a tiny bit of structure in this coffee grind.
Most of the time, it takes two twists to a finer setting from the Hario V60 grind size. Or three twists to a coarser grind size from the Moka pot.
This is how I always have a consistent grind size for every coffee brewing technique. This preciseness can only be done with a hand grinder or an electric burr grinder when you've perfected the different grind settings.
It's a fun journey to get that right grind size each time you feel like making coffee. After you've read the rest of the article, I hope you've gathered enough information to start your homebrewing journey.
The amount of ground coffee and water is the next most important thing to make awesome coffee with the AeroPress. This isn't like the other coffee techniques and uses less water to produce a smaller amount of coffee.
I've listed the amounts of water and coffee that I like to use for AeroPress coffee down below:
| Amount of coffee made: | Amount of coffee needed: | Amount of water needed: |
| 2 oz (60 ml) | 17 grams | 2 oz (60 ml) |
| 4 oz (120 ml) | 34 grams | 4 oz (120 ml) |
| 6 oz (180 ml) | 51 grams | 6 oz (180 ml) |
| 8 oz (240 ml) | 68 grams | 8 oz (240 ml) |
The coffee made with this technique differs a lot from the pour over techniques, for example. This technique uses less water to produce a more concentrated form of coffee.
To brew coffee with the AeroPress, follow the next steps:
- Collect the AeroPress cylinders with the filter cap, a coffee filter, the coffee stirring wand, and your ground coffee.
- Boil the water as mentioned in the table above (depending on how much you plan to make).
- Add a small filter circle to the filter cap, and once filled, twist the filter cap onto the bottom cylinder of the AeroPress. Make sure this is securely fastened.
- Now, add the ground coffee to the cylinder with the filter cap attached.
- Shake the AeroPress so the coffee bed is flattened completely.
- Place the AeroPress on your favorite coffee mug.
- Pour in the amount of water needed. You can best use a scale to measure this.
- Stir the coffee and water mixture with the stirring wand for the next 10 seconds.
- After 10 seconds, remove the stirring wand, and place the remaining cylinder on top.
- Place one hand on the bottom compartment, ensuring that the coffee brewer stays on your coffee mug and will not slip off.
- With the other hand, press down on the coffee brewer. This will take a bit of power, so make sure to press hard enough.
- You'll see the cylinder slowly gliding to the bottom. Once you hear a hissing sound, you can remove the coffee brewer from your coffee mug completely.
- You've now made ridiculously amazing tasting coffee that you can use for a ton of stuff!


When the coffee brewer is removed from the cup, it's still a bit hot on the sides. So make sure to handle this with care.
Once cooled down for a few minutes, twist the filter cap from the cylinder and rinse this off. Push the cylinder through the coffee-filled one. The coffee puck will pop out, and you can clean the remaining pieces.
If you want to get a more in-depth look into cleaning an AeroPress, I've written an article to show you 4 ways to clean an AeroPress. It's exciting as I offer you multiple ways to clean it.
I just told you everything there's to know about the brewing of AeroPress coffee. If you want to learn more about it, you can check out this complete guide to brewing AeroPress coffee.
Moreover, there's a different technique to brewing AeroPress coffee called the "inverted method". It's a cool take on brewing AeroPress coffee and is almost like brewing pour over coffee.
You're turning the whole brewing upside down and pouring water on top of ground coffee, just like pour over coffee. If you want to check it out, you can do so by clicking here.
Conclusion
Wow, this was an amazing article to write. In this article, I've talked about all the different coffee brewers to make great coffee at home and have shown you how to brew with them.
This article is a full guide to making coffee at home for beginners. I've listed every bit of information that I have on the different brewing guides, other equipment needed, the best coffee beans to use, and so much more.
I hope to have given you enough information to get started on your home brewing coffee journey. Your Dream Coffee is a place to get all the latest information regarding coffee trends and these articles to help you get started with coffee.
If you're interested in learning even more about coffee in general, then you can check out the article I've listed below. There are a few articles that I think you'll be interested in checking out. Either way, have a great rest of your day!
Will you be trying out these brewing techniques? Let me know by leaving a comment down below. If you have any other questions regarding coffee, you can also contact me directly by pressing the "Contact Me" button at the top!


")
